Notice: A non well formed numeric value encountered in /home/skcosvke/public_html/wp-content/plugins/crayon-syntax-highlighter/crayon_formatter.class.php on line 118
Notice: A non well formed numeric value encountered in /home/skcosvke/public_html/wp-content/plugins/crayon-syntax-highlighter/crayon_formatter.class.php on line 119
I recently conducted a Google PageSpeed test for a new client of mine and found a number of recommendations. For those of you who are not familiar with Google’s PageSpeed Insights tool, it analyses the content of a web page, then generates suggestions on how to make that page faster.
So, off the back of my research and recommendations, I decided to create this blog post to provide practical guidance and solutions to some common issues that have a negative impact on page speed.
What is Page Speed?
Page speed is often confused with “site speed,” which is actually the page speed for a sample of page views on a site. Page speed can be described in either “page load time” (the time it takes to fully display the content on a specific page) or “time to first byte” (how long it takes for your browser to receive the first byte of information from the web server).
No matter how you measure it, a faster page speed is better; faster pages both rank and convert better.
Before you begin…
It’s important to note that there are multiple solutions available to the page speed improvements recommended by Google Page Speed Insights Tool. Some of my choices were influenced by the hosting solution and the CMS my client uses, in this instance WP Engine, which is a specialist WordPress hosting solution.
If you’re using WP Engine, I highly recommend that you utilise the staging environment feature to test the recommendations in this post. I also recommend that you utilise and implement the Content Distribution Network (CDN) feature.
Because the GooglePage Speed Insights Tool only analyses a single page at a time, I recommend installing a plugin called Google Pagespeed Insights for WordPress. This plugin will provide greater clarity and information across all your pages. I also recommend that you use Pingdom.com, which I found incredibly useful.
Optimising images
You have a number of options available to you in regards to compressing and optimising your images, they include:
- Manually optimising images, using software such as Adobe Photoshop or Illustrator
- Uploading your images to a 3rd party resource such as tinypng.com
- Installing a plugin which can automatically compress and optimise your images every time you upload an image
Considerations you need to make when optimising images are file size vs quality. You may wish to sacrifice image size to maintain quality but the ideal outcome is to achieve both quality and a reduced image file size. Sites such as Imagify have different levels of compression for this very reason.
Eliminate render-blocking JavaScript and CSS in above-the-fold content
CSS
Basically, there are two options that I recommend but both require the use of the Autoptimize Plugin, which you can find on the WordPress Plugin Directory. The challenge is locating the critical CSS required – in this post, I’ll provide you with two options that you can use, both of which worked for me.
Option 1 – The Critical Path CSS Generator
Go to: https://jonassebastianohlsson.com/criticalpathcssgenerator/
Step by Step Process
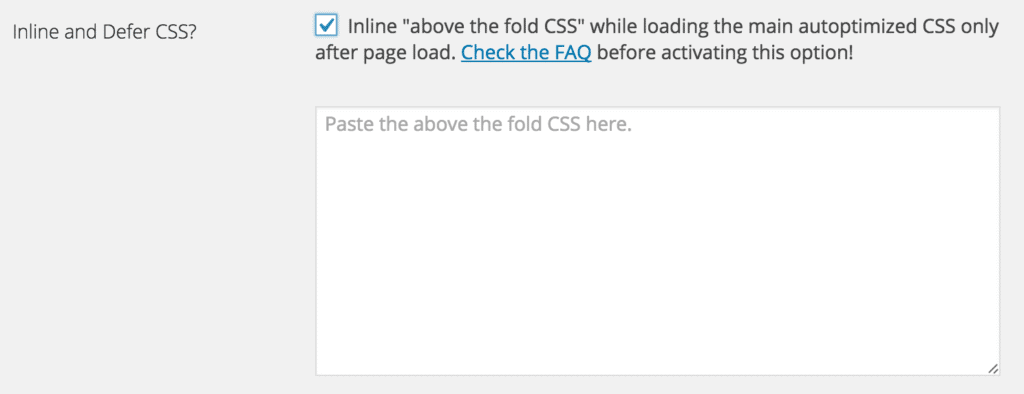
- Paste the contents of your style.css file in the box on the left hand side and click the ‘Create Critical Path CSS’ button.
- The critical path CSS will now be available in the box adjacent to the original style.css file code.
- Copy and paste the critical path CSS in the ‘Inline and defer CSS?’ section of the Autoptimize settings (see screenshot below).
- Click ‘Save Changes and Empty Cache’
Option 2 – CriticalCSS Bookmarklet and Devtool Snippet
The alternative method I found was from a web developer called Paul Kinlan. Paul produced this bookmarklet tool called CriticalCSS Bookmarklet and Devtool Snippet. This tool locates the critical CSS on a page. We require this CSS in order to inline and defer CSS within the Autoptimize plugin.
Note: After reading some comments on Github, Paul Kinlan’s version of the tool does not support media queries. However, this version of the tool does support media queries: https://gist.github.com/james-Ballyhoo/04761ed2a5778c505527
What the tool does (taken from paul.kinlen.me):
- Iterate across every element in the Document Object Model (DOM)
- Accept elements whose “top” is within the height of window.
- Detect the list of styles that currently apply to the element in view using window.getMatchedCSS(node)
- Add them to a bucket.
- Returns the list of CSS
According to Paul Kinlen, there are some caveats to this tool,:
- It only works in WebKit and Blink engines.
- It doesn’t know about Media Queries it only determines content based on the current viewport
- It will not find the CSS selectors for psuedo elements such as :hover etc.
Step By Step Process
- Select and copy the source code from https://gist.github.com/james-Ballyhoo/04761ed2a5778c505527
- Open a browser, go to the domain in question and inspect element
- Click on ‘Sources’ within the dev tools and create a new folder (snippet)
- Paste the source code into the new snippet folder and run the script
- The script should have generated the critical CSS required – copy and paste the CSS in the ‘Inline and defer CSS?’ section of the Autoptimize settings
- Click ‘Save Changes and Empty Cache’
How to remove Google fonts from CSS in above-the-fold content
If you’re using Google fonts with your theme, it’s likely that you will see them appearing in the ‘Eliminate render-blocking Javascript and CSS in above-the-fold content’ results of the Google PageSpeed Insights Tool. A way around this is to host the Google fonts. I found this great step by step process that you can follow here
How to defer Javascript files
The Google PageSpeed Insights Tool provides you with details of the JS file/s (if any) that need to be deferred. As mentioned at the beginning of this post, there are number of solutions you can use but this particular solution I have tried and tested.
- The first thing you need to do is create a JavaScript directory and name it defer.js.
- Save this file in the root of your theme file
- All the JavaScript codes that you want to defer must be saved in this folder (defer.js)
- Copy the code below and paste it before the closing head tag </head>, which you will find within your header.php file of your theme.
|
1 2 3 4 5 6 7 8 9 10 11 12 |
<script type="text/javascript"> function downloadJSAtOnload() { var element = document.createElement("script"); element.src = "defer.js"; document.body.appendChild(element); } if (window.addEventListener) window.addEventListener("load", downloadJSAtOnload, false); else if (window.attachEvent) window.attachEvent("onload", downloadJSAtOnload); else window.onload = downloadJSAtOnload; </script> |
Enable Compression
Your server needs to be configured to enable GZIP compression. Fortunately WPEngine already has this enabled. However, if you need to enable gzip compression, you can copy and paste the following module into your .htaccess file.
|
1 2 3 4 5 6 7 8 9 10 |
<ifModule mod_gzip.c> mod_gzip_on Yes mod_gzip_dechunk Yes mod_gzip_item_include file .(html?|txt|css|js|php|pl)$ mod_gzip_item_include handler ^cgi-script$ mod_gzip_item_include mime ^text/.* mod_gzip_item_include mime ^application/x-javascript.* mod_gzip_item_exclude mime ^image/.* mod_gzip_item_exclude rspheader ^Content-Encoding:.*gzip.* </ifModule> |
To test if the module is working, you can use the following gzip test tool, created by Gift of Speed: http://www.giftofspeed.com/gzip-test/
Minify JavaScript, CSS and HTML
The Autoptimize plugin will take care of the minifcation process for you. I think it’s worth mentioning that WP Engine recommended Autoptimize in one of their Webinar’s on improving page speed. It’s also achieved a large number of downloads (over 100,000) and has excellent reviews.
If, for whatever reason, you decide to manually minify your Javascript, CSS and HTML files in the future, below are some resources which will help you with this process:
Javascript: http://jscompress.com/
CSS: http://www.cleancss.com/css-minify/
HTML: https://github.com/kangax/html-minifier
Leverage browser caching
There are two approaches to manually leveraging browser caching, both of which require additional code being added to the .htaccess file. You can access your .htaccess file via an FTP or if you have the Yoast SEO plugin installed, you can navigate to the plugin’s settings and locate the .htaccess file in the Tools > File Editor
The ‘Expire’ Option:
The following rule must be added to the very top of the .htaccess file:
|
1 2 3 4 5 6 7 8 9 10 11 12 13 14 15 16 |
## EXPIRES CACHING ## <IfModule mod_expires.c> ExpiresActive On ExpiresByType image/jpg "access 1 year" ExpiresByType image/jpeg "access 1 year" ExpiresByType image/gif "access 1 year" ExpiresByType image/png "access 1 year" ExpiresByType text/css "access 1 month" ExpiresByType text/html "access 1 month" ExpiresByType application/pdf "access 1 month" ExpiresByType text/x-javascript "access 1 month" ExpiresByType application/x-shockwave-flash "access 1 month" ExpiresByType image/x-icon "access 1 year" ExpiresDefault "access 1 month" </IfModule> ## EXPIRES CACHING ## |
The ‘Cache-Control’ Option:
The following rule must be added to the very top of the .htaccess file:
|
1 2 3 4 5 6 7 8 |
# One year for image files <filesMatch ".(jpg|jpeg|png|gif|ico)$"> Header set Cache-Control "max-age=31536000, public" </filesMatch> # One month for css and js <filesMatch ".(css|js)$"> Header set Cache-Control "max-age=2628000, public" </filesMatch> |
You should now be far closer to achieving a higher PageSpeed score, but more importantly, you should have enhanced your site’s user experience.